

Are you ready to add some WOW to your asexual and sexual reproduction lesson plan? Exploring the awesome features of life’s reproductive processes is an important part of learning in middle school. In this post, I’ll share some engaging ideas with you to help captivate your students and make your students say “WOW!”.
Understanding the mechanisms behind these processes is crucial for understanding the diversity of life on our planet. In this post, I will share 7 exciting lesson plan ideas that will for an unforgettable experience in your classroom.
First, I will share 3 different WONDER strategies that will help your students become curious and internally motivated to learn more about the topic. Second, I will share an interactive lesson that will engage your students in learning more about the vocabulary and concepts associated with the topic. Finally, I will share 3 different WIDEN strategies to help your students learn beyond what your state standards may require. They will share their knowledge they have gained in the process as well.
Let’s create your asexual and sexual reproduction lesson plan!
Asexual and Sexual Reproduction Lesson Plan WONDER Strategies
WONDER strategies are crucial to get your students hype and excited about learning a new topic. Below, I share 3 different WONDER strategies that you can do with your students to get them excited about learning more about asexual and sexual reproduction.
Observe Yeast Cells
One activity that is so fun and engaging is observing yeast cell reproduction under the microscope.
What will you need?:
- microscopes (enough per group of students)
- glass slides
- coverslips
- yeast
- sugar
- sterile water
- pipettes
What will you need to do?
- First, you’ll prep the yeast culture. You can mix a packet of yeast (around 2 1/2 tsp) and a spoonful of sugar in. Add about 50 mL of water. Mix gently.
- Then, you will prepare the slide. Using the pipette, place a drop of the yeast culture onto the slide. Make sure it’s not too large. You don’t want it to overflow.
- Place the coverslip over the drop.
- Place the slide under the microscope and begin observations. Begin with the lowest magnification objective lens and move your way to a closer look if the focus allows you to do so.
- Begin observing yeast reproduction and take notes! You will see them budding (a type of asexual reproduction)!
Enjoy the exploration!
Will this be a part of your asexual and sexual reproduction lesson plan?
[Disclaimer: This post contains Amazon affiliate links. If you make a purchase through these links, I may earn a small commission at no extra cost to you.]
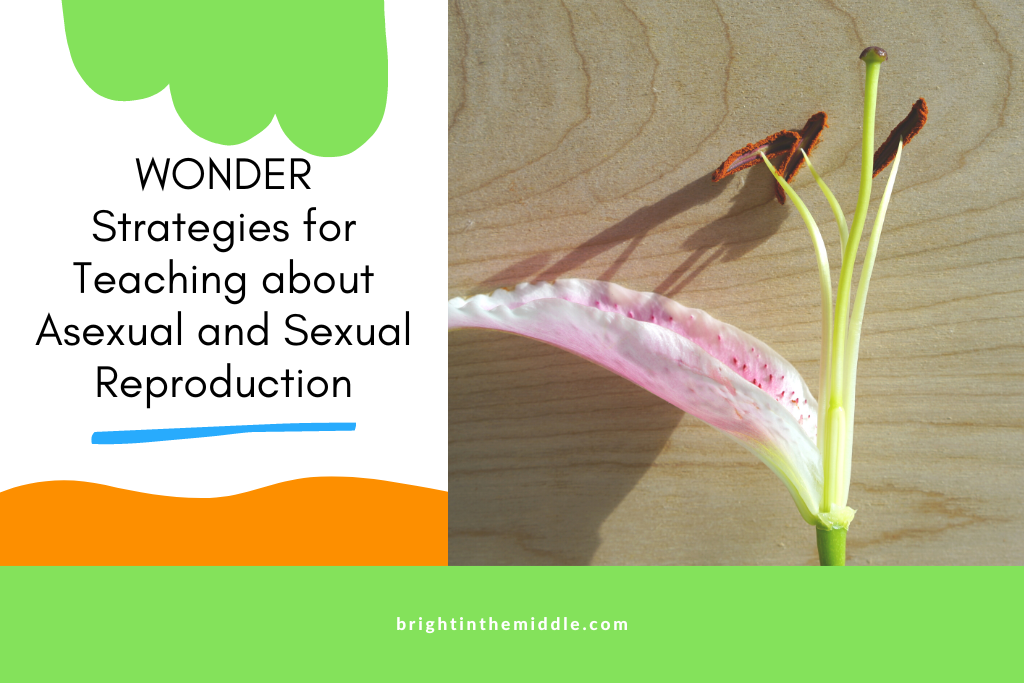
Flower Dissection
Another fun WONDER activity will be to allow your students to do flower dissections.
What will you need?:
- You’ll need fresh flowers such as lilies, tulips, or roses.
- scissors or scalpel
- tweezers
- magnifying glasses
- dissection trays or plates
- white paper
What will you do?
- You will tell your students that they will observe sexual reproduction in plants. At this point, students should have already learned about the different parts of the flower, but it doesn’t hurt to review.
- You will give each group of students (I do everything in groups.) a fresh flower to dissect.
- Have students to carefully examine the features on the outside of the flower using the magnifying glasses (or hand lenses). Ask them to draw what they observe and label if possible.
- Tell the students to gently remove the petals and sepals using their fingers or scissors. Make sure they are careful to avoid damaging the reproductive structures.
- Observe the stamen. Ask students to identify the stamen, the male reproductive part of the flower. They can carefully remove the stamen from the rest of the flower using the scissors or scalpel.
- Have students to observe the stamen and its different parts: including the filament and the anther. Make students draw and record their observations.
- Students can then locate the pistil, the female reproductive part of the flower. They can observe the different parts of the pistil, including the stigma, style, and ovary.
- Then, you can tell students to gently tap the anther of the stamen onto a piece of white paper. They may be able to see pollen grains. Make sure they, again, record their observation.
- Then, it’s time for discussion. Explain how pollen fertilizes the ovules in the ovary to form seeds. Focus on the process of sexual reproduction in plants.
Here is a great video you can use as your guide!
If you do this along with the yeast cell observations, you can discuss the differences between the process of budding that occurs in the yeast and the sexual reproduction process that occurs in plants.
Will you add this to your asexual and sexual reproduction lesson plan?
Some Animals Don’t Need a Male to Reproduce?
So maybe you don’t have time to dissect a flower or observe yeast cells under a microscope, but you do want to do a WONDER strategy to get your students engaged.
I got you! You can show a video of a concept that will make your students go “what?!”
Most middle school students understand that, at least with humans, in most animals you need a male and female for reproduction to occur.
However, there are exceptions to this rule! Some fish, amphibians, reptiles, and others can reproduce through a process called parthenogenesis.
Here is a video that you can show to your students to introduce this concept.
This is an easy way to add a WONDER strategy to your asexual and sexual reproduction lesson plan!
Asexual and Sexual Reproduction Interactive Lesson
Your students are hyped up now, right? Then, it is time to dive into more of the vocabulary and content of this topic. I think interactive lessons are a great way to go through (as well as review) content.
Why? Interactive lessons are great for reducing student cognitive load. By doing this, students are more likely to retain the material because they are not overwhelmed with too much information at one time. These lessons do this by using the 7 steps to help students retain information.
They are also fun!
What is the purpose of asexual reproduction? What are the similarities between asexual and sexual reproduction?
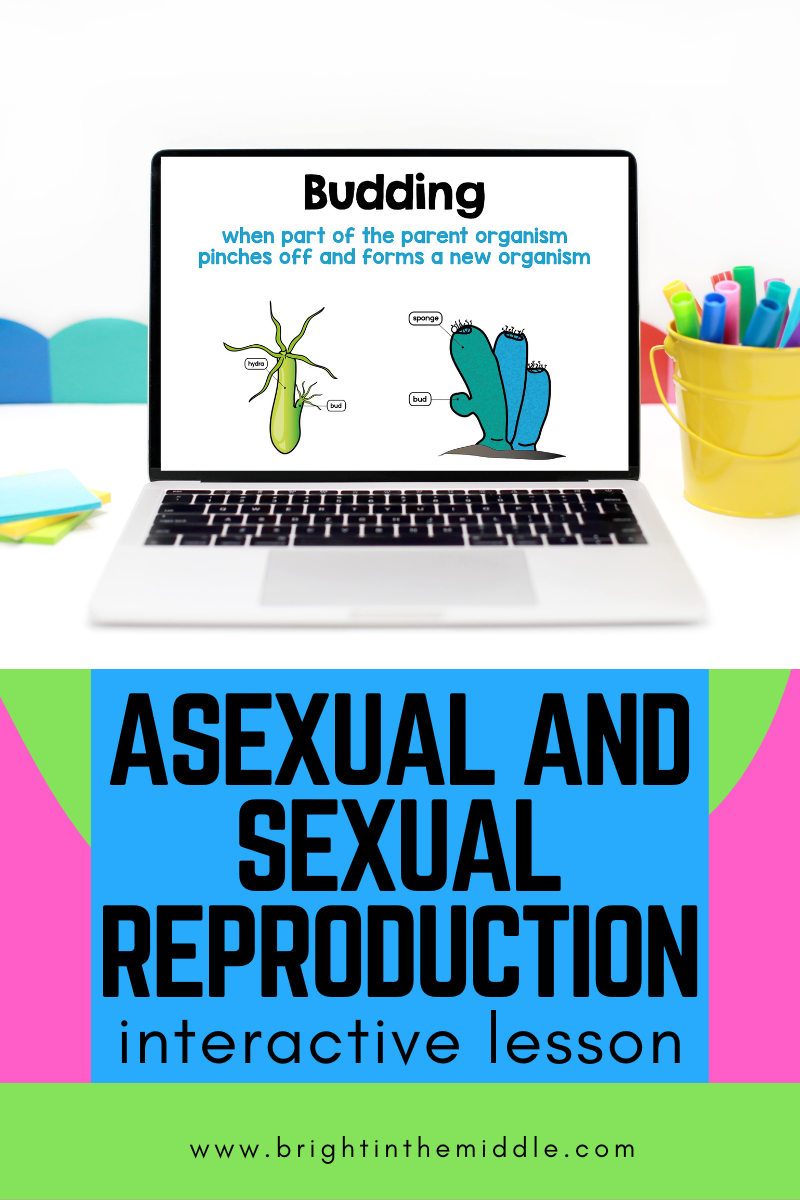
This asexual and sexual reproduction interactive lesson will guide students through learning about asexual reproduction, sexual reproduction, the difference between asexual reproduction and sexual reproduction, what are the advantages of sexual reproduction and asexual reproduction (and disadvantages), 3 types of asexual reproduction, fertilization, zygote, gametes, and more!
Inside of the lesson, there are embedded questions to help students process pieces of information a little at a time. These include answering questions, drag-and-drop activities, matching vocabulary, and more! Skip the asexual and sexual reproduction worksheet with these activities!
Don’t forget to add this to your asexual and sexual reproduction lesson plan!
You can find this in the Bright in the Middle Shop.
You can also find this on TPT.
Asexual and Sexual Reproduction Lesson Plan WIDEN Strategies
As with any topic, there is always a way to extend the lesson and allow for activities that will help your students widen their knowledge. You can also skip the asexual vs sexual reproduction worksheet with these activities!
Here are three ways you can do this that will add to your asexual reproduction lesson plan and sexual reproduction lesson plan.
Swab Samples
In this activity, students will be swabbing samples from different areas of the school to observe the growth of asexual microbes. This is also a great tie-in to a lesson on pathogens and diseases!
What will you need?:
- cotton swabs
- agar plates – created or purchased
- sealable bags – plastics
- permanent marker to label agar plates
- gloves to wear during the swabbing process
What will you do?
- Brainstorm some places in the school that you can swab. Each group can choose to swab a different area. These may include doorknobs, toilet bowl, a phone, classroom desks, water fountains, etc.
- Students will take a cotton swab and gently rub the surface that they chose. To avoid contamination, carefully place the swab into the sealable plastic bag.
- Once in the classroom, students take the cotton swab and gently rub it on the surface of the agar.
- Make sure the plate is then closed, properly sealed, and then labeled.
The agar plates can be placed in an incubator or a warm, dark place. Students can make predictions on what they think will happen.
After growth has occurred, have your students to observe and record the growth of the asexual microbes. Compare and contrast each plate. It is so interesting!
Here is a video that you can use as a guide!
Your students will love this addition to your asexual and sexual reproduction lesson plan!
Guest Speaker – Botanist
Another great WIDEN activity is to invite a guest speaker into your classroom to allow your students to talk with an expert on the topic. In this way, the professional can share their expertise and students can ask all of their burning questions!
A botanist is a great guest speaker to invite to your classroom. Ask the botanist to focus their discussion on plant reproduction.
They will be able to offer insights on the different methods of asexual and sexual reproduction that occurs in different types of plants.
You can then ask your students questions such as, “Why is sexual reproduction better than asexual, or is it?”.
Great guest speakers are a wonderful addition to any topic. Go ahead and add it into your asexual and sexual reproduction lesson plan!
Can’t bring a guest speaker into your classroom? Try a virtual speaker.
Grow Potatoes
If you have the means to do so, you can grow your own potatoes! Potatoes reproduce asexually with tubers.
Watch this video to learn how!
What will you add to your sexual reproduction and asexual reproduction lesson?
Help your students master science content!

[…] Asexual and Sexual Reproduction […]